Partitioning the Hard Disks Under Debian/Ubuntu and Resizing the Partitions
After reading this tutorial, you will be able to partition your hard drive and resize the partitions both from the command line and from the graphical environment. The programs used in this tutorial are fdisk, cfdisk and GParted.
In this tutorial, we will partition our hard disk both in graphical and command modes and resize the different partitions.
All steps described in this article contain screenshots, making it easy for every user to understand and follow them.
Note: All the steps described in the following cannot be undone. Be careful.
Partitioning and Resizing the Partitions with “cfdisk”s
The cfdisk utility is an interactive alternative to the widely known fdisk program to manage the partitions.
The first section of this tutorial describes how to use the cfdisk to create and resize the partitions.
Before starting, check the available partitions using fdisk followed by the -l (List) flag as shown in the following screenshot:
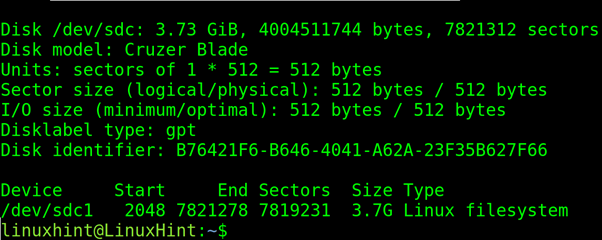
As you can see, there is a drive which is identified as /dev/sdc with a partition (/dev/sdc1). That’s the drive that we want to work on.
To open the /dev/sdc device using cfdisk, run the command shown in the following figure. Remember to replace /dev/sdC with /dev/sdX, where X is your drive’s letter.

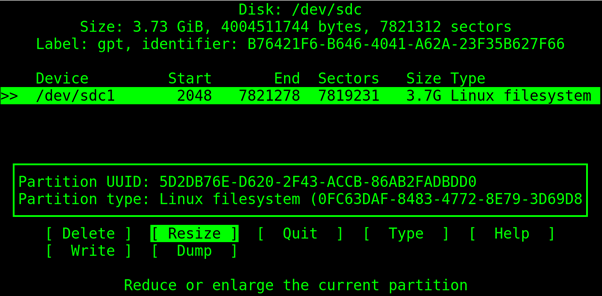
Add a new partition. Before doing that, we, need to resize the existing partition which takes up all the drive space.
Using the Left/Right keys, move to the Resize option and press ENTER.
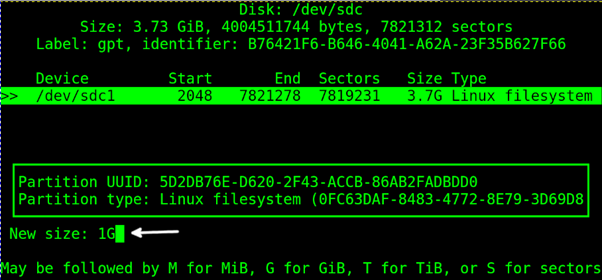
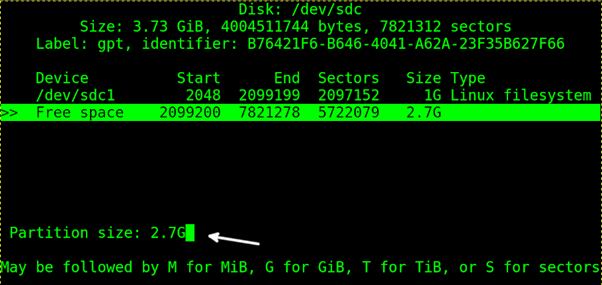
In the next step, you need to define the new size for your partition. As you can see in the following image, we defined 1 GB. Type the size number followed by the letter which identifies the unit type (M for MiB, G for GiB, T for TiB or S to define sectors).
After typing the desired size, press ENTER.
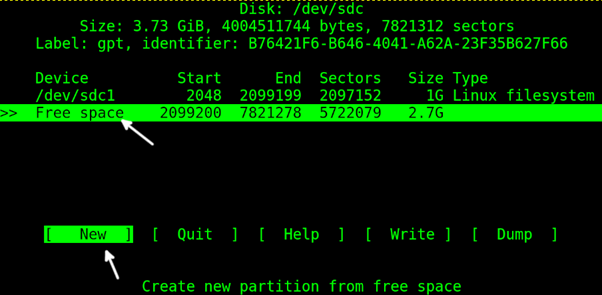
After resizing the partition, you now have a free unallocated space to create a new partition.
Use the Up/Down keys to move to the Free space option. Then, use the Left/Right arrows to move to the New option, then press ENTER.
Again, define the size for the new partition and press ENTER. In our case, we left the default value which takes all the available free space.
By default, the created partition is formatted in Ext4. If you want to change the filesystem type, move to the Type option and press ENTER.
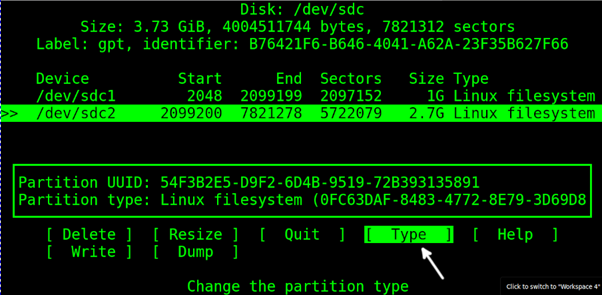
At this stage, use the Up/Down keys to see all the available file systems. Select it and press ENTER.

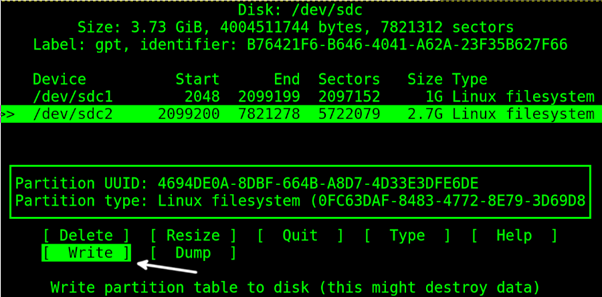
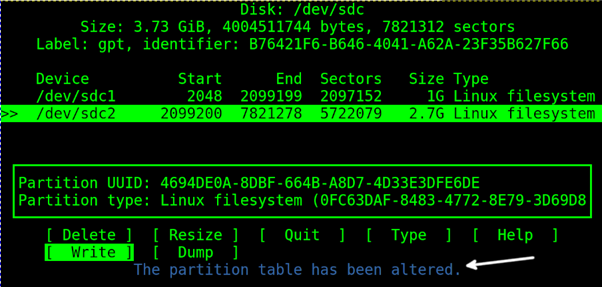
Now, move the Write option and press ENTER to apply the changes.
You will be asked to confirm the operation. To confirm it, type “yes” (without quotation marks) and press ENTER.
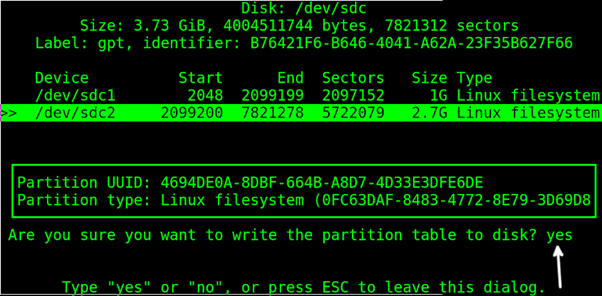
As you can see in the following illustration, the partition table is modified successfully.
Partitioning and Resizing the Partitions Using “fdisk”
The fdisk tool is the most widely used to manage the partitions, specially in Linux environments.
As done with fdisk, the first step is to run the fdisk followed by the -l (List) flag to see the available partitions.
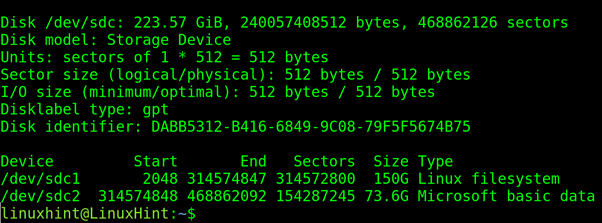
As you can see, there is a device under /dev/sdc that contains two partitions (/dev/sdc1 and /dev/sdc2).
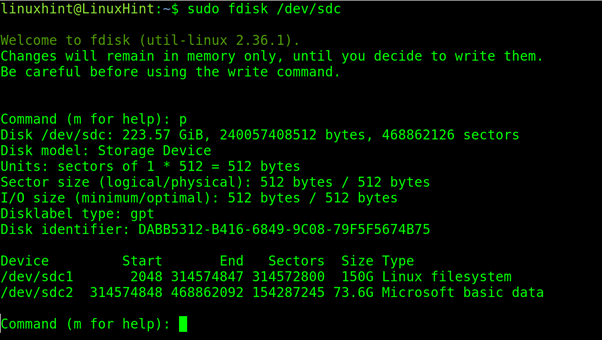
Execute fdisk followed by the device that you want to work on. In our case is the /dev/sdc, where sdc must be replaced with your drive.
Then, press the letter “p” in your keyboard to show the drive partitions.
Then, in the command prompt, type the letter “p” in your keyboard and press ENTER to show the drive partitions.
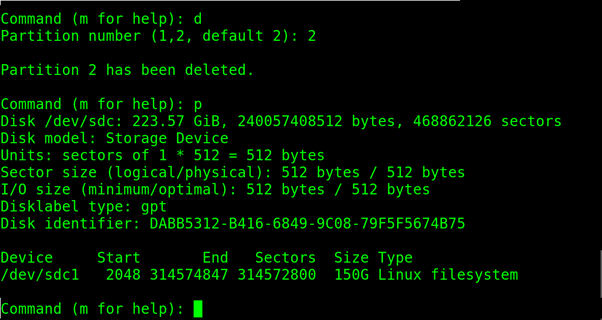
After listing your partitions, press the letter “d” (Delete) on the command prompt and press ENTER. Then, you will be asked the partition number that you want to delete. In our case, we want to remove the partition /dev/sdc2. Therefore, we type “2” and press ENTER.
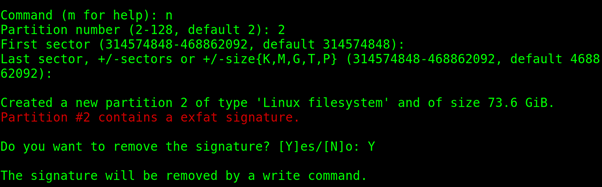
To create a new partition on the freed space, type “n” and press ENTER. Define the partition number (in our case is 2 because there is only an /dev/sdc1 existing partition now).
Then, you will be asked to define the first and last sectors. By default, fdisk takes the first free sector to the last one. If you want to assign the entire free space to the new partition, just press ENTER when asked about the first and the last sectors.
In our scenario, the removed partition was an exFAT partition. The fdisk asks if you want to remove the exFAT signature. We want an ext4 partition so we type “Y” and press ENTER.
Finally, to apply the changes, type the “w” (Write) letter and press ENTER.
Note: In the following screenshot, before writing the changes, we type “p” to see if the partitions are correct.

Partitioning and Resizing the Partitions Using GParted
GParted is the graphical alternative to fdisk and cfdisk. This may be the best choice for the users who are not familiar with the Linux terminal.
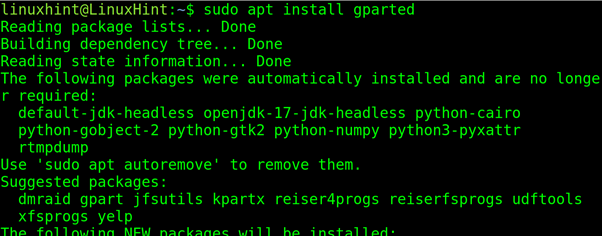
To install the GParted on Debian based Linux distributions, run the apt command as shown in the following:
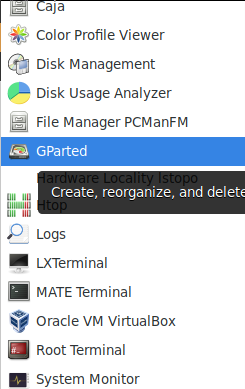
You can run the GParted from the terminal or from the Applications menu as shown in the following image:
When GParted shows up, select the device that you want to work on in the upper right corner as shown in the following screenshot:
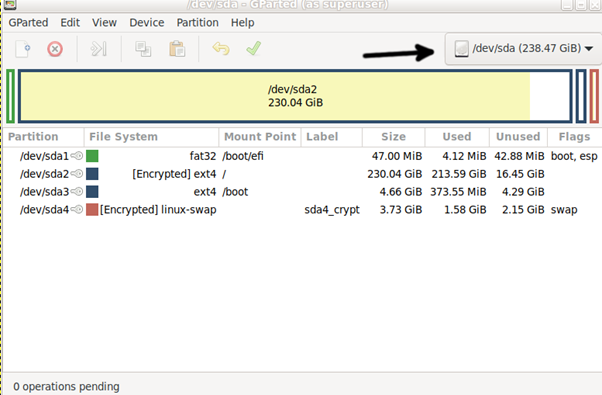
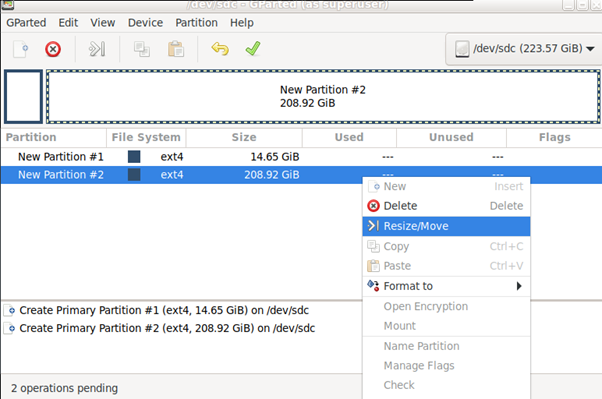
You will see the device partitions. Right click on the partition that you want to resize and press Resize/Move.
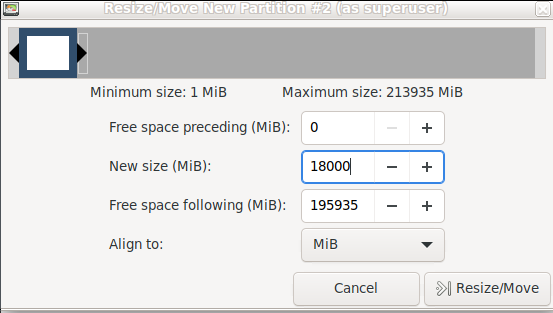
On the New size (MiB) field, type the number of MB to resize the new partition. The Free space following (MiB) option changes automatically. Then, press the Resize/Move button.
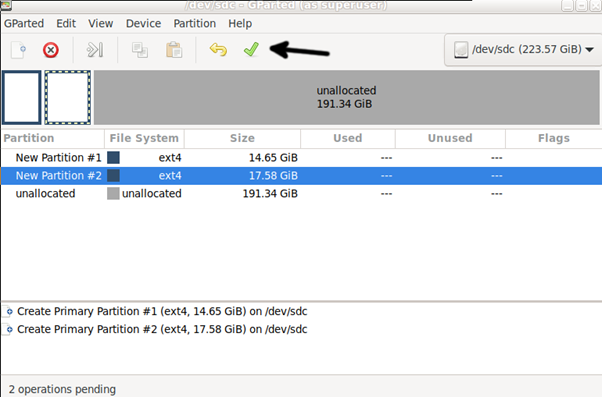
Once resized, you only need to apply the changes by pressing the green checkmark as shown in the following:
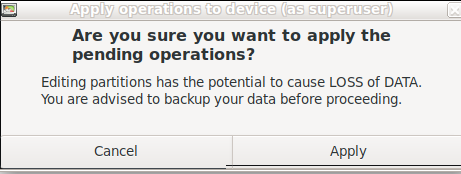
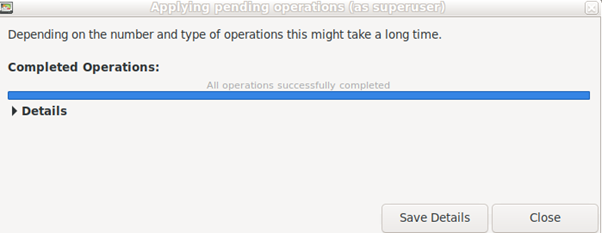
You will be requested to confirm the operation. Press the Apply button to do it.
After finishing the process, press the Close button. Now, you can close the GParted tool.
That’s how to manage the partitions from the Linux X Window Manager.
Conclusion
A proper server installation requires a proper partitioning in contrast with a workstation in which we usually install everything under the root partition (/). When we plan a server installation, we estimate the size for the different aspects of the server, dividing it for backup, security, or technical purposes. We can determine a partition as ext4 or reiserfs according to the file system that we need or limit the size.
As you can see, managing the partitions is an easy task that any Linux user can achieve by following a few steps like the ones described in this tutorial, independently of the experience level. All methods previously explained are valid for every Linux distribution. Remember that all the changes that you do cannot be undone so better be careful.
Thank you for reading this tutorial that explains how to partition and resize the disks. Keep following LinuxHint for additional Linux content and tips.

Source: linuxhint.com